Have you ever dreamed of a tool that could elevate your productivity, inspire creativity, and tackle complex tasks with ease? Whether you’re a student striving for academic success, a teacher seeking to engage your class, or someone who loves learning, customized GPTs within ChatGPT can be a game-changer. These GPTs can aid students with homework or exams, help teachers craft engaging lesson plans, and enable educators to manage their responsibilities more effectively. In this article, you’ll discover how to make your own customized GPTs, transforming the way you work and learn.
Benefits of Making Your Own GPT
There are many advantages to creating your own GPTs. For example, you can integrate course material into ChatGPT. That way, ChatGPT can provide tailored responses to your students that are directly relevant to the content of your course. Additionally, you can adjust the response tone of ChatGPT to suit different learning styles (e.g., formal vs. conversational), or provide a list of topics to filter out, making sure that ChatGPT’s interactions remain focused and appropriate for all students.
For Teachers:
You can use GPTs to support students efficiently, even outside your regular office hours. For example, you can create chatbots that help students solve complex programming questions, or to answer frequently asked questions about your syllabus.
For Students:
You can use GPTs to invent new ways to engage with your study material beyond traditional channels. However, in this post, we will focus on teachers for now.
The integration of GPTs beyond the standard ChatGPT offers significant other advantages:
- 1 GPTs take away the need for users (such as students) to write detailed prompts to get the support they need. Rather than letting users “try out” their own prompts to get help, you can take charge by embedding prompts (and accompanying documents) in the GPT. As a result, it will be context-aware when used by students right from the start.
- 2 GPTs can be shared with others. Hence, you can just include a link to your custom-made GPT and students will be able to chat with your GPT.
Step-by-Step Guide to Making a Custom GPT
Let’s now explore how to create your own GPT. Creating your own customized GPT within ChatGPT is a straightforward process. Unlike crafting Chatbots with tools like Chatbase, where you often need specific programming skills, GPTs allow you to give instructions in plain English. Here’s a step-by-step guide to help you get started:
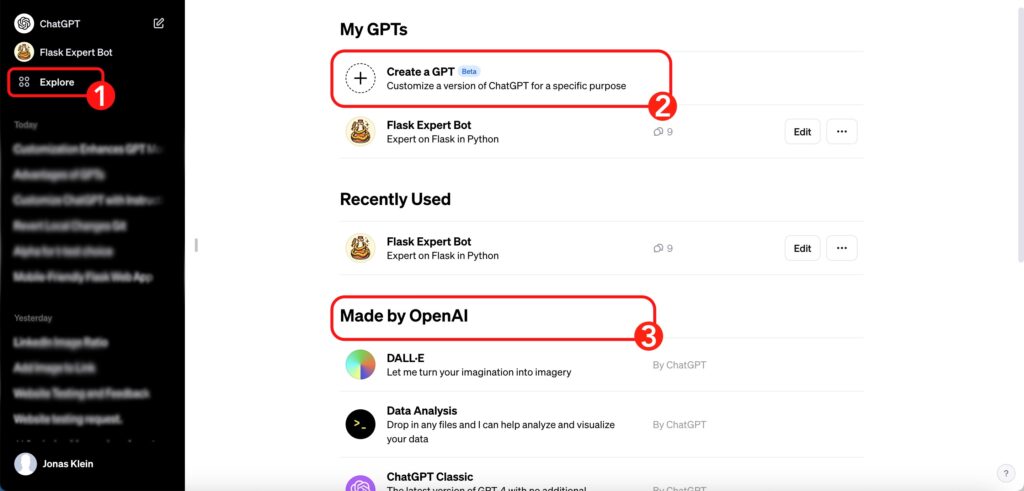
- Open ChatGPT and Click “Create”: Start by logging into your ChatGPT account. Open the left sidebar and click on the Explore (1) button, giving you an overview of all GPTs that have been installed. In this pane, you can now either create your own GPT (2), or discover the GPTs already made by OpenAI (3). Click on the “Create” button to begin the customization process.
2. Use the GPT Builder Interface: In the GPT Builder interface, provide detailed instructions on what kind of assistant you want to create. Describe its purpose, capabilities, and any specific knowledge or data it should have.
3. Specify Instructions: Set the instructions that will guide your GPT’s behavior. Outline what it should do and what it should avoid to make sure it meets your needs.
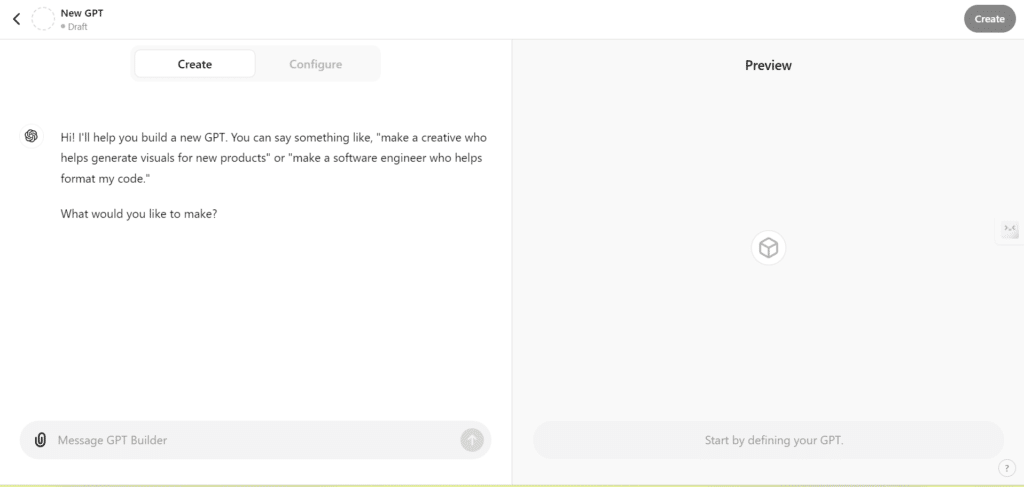
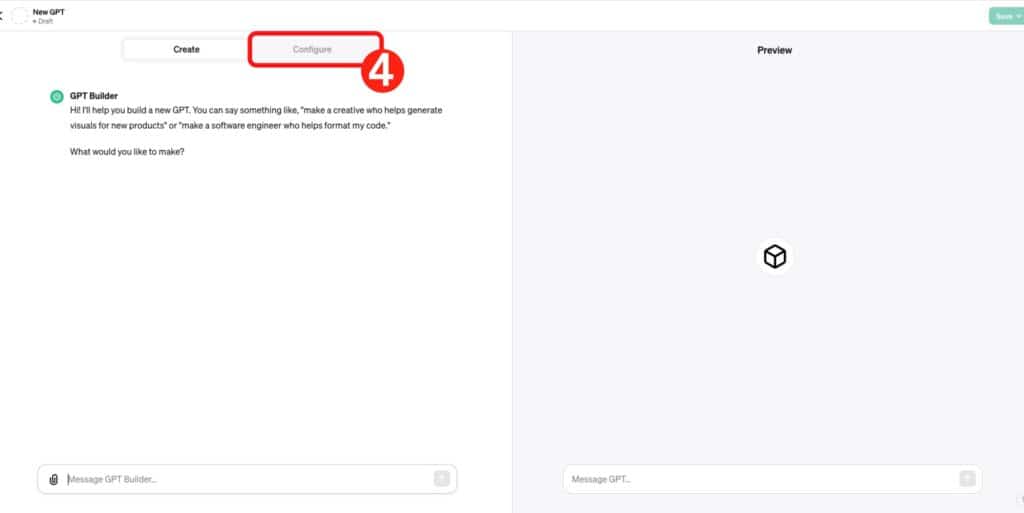
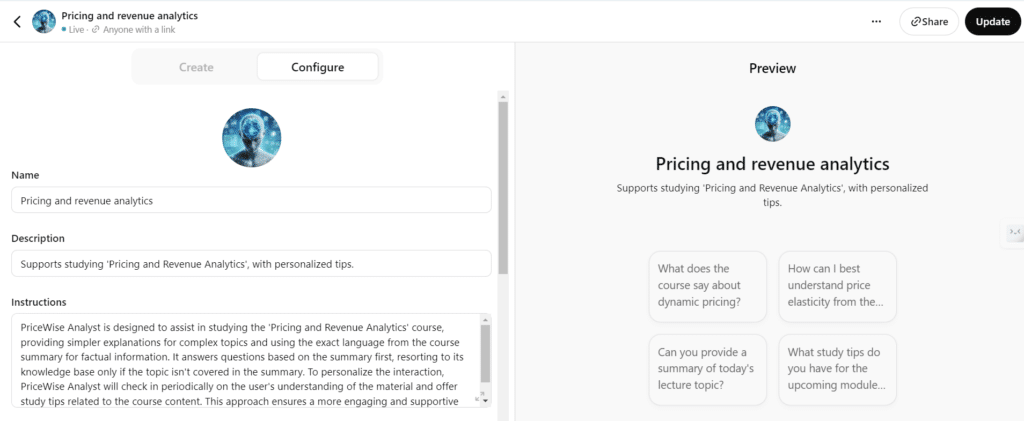
After receiving your instructions, GPT autonomously generates its own set of instructions. This process doesn’t mean you lose oversight of your Chatbot’s actions. Fortunately, you can always review the instructions that ChatGPT has created by visiting the “Configure” tab (4), as illustrated below. This feature ensures you maintain control and understand exactly how your Chatbot will operate. To start, it’s best to use the “Create” tab, where you can essentially set up the entire GPT using plain English. When you input instructions into the GPT Builder within the “Create” tab, it automatically configures everything in the “Configure” tab for you. This streamlined process simplifies the initial setup, allowing for an efficient and user-friendly experience.
4. Name Your Custom GPT: Give your GPT a unique name and add a short description to define its role clearly.
5. Customize Conversation Starters: Create the prompts or buttons that will initiate interactions with your GPT, making it easy for users to start using it effectively.
6. Upload Relevant Data Files (Optional): If your GPT needs specific knowledge, upload relevant data files (e.g., CSV, text files) that it can use as a reference.
7. Configure Additional Settings: Adjust additional settings such as enabling web browsing, image generation capabilities, or defining custom actions (APIs) for your GPT to interact with external data or services.

8. Test Your GPT: Use the preview window to test your GPT and ensure it behaves as intended. Make any necessary adjustments based on your testing.
9. Save and Publish Your GPT: Once you are satisfied with your GPT, save and publish it. Choose the visibility level (private, shared link, or public) based on how you want others to access it.
Tips for Fine-Tuning and Optimization
- Be Specific: The more specific you are with your instructions and data, the better your GPT will perform.
- Iterate: Don’t be afraid to go through multiple iterations. Each round of testing and refining will improve your GPT’s performance.
- Leverage Feedback: Use feedback from yourself and others to make continuous improvements.
Use case: A Chatbot that helps students implement the takeaways of an academic paper
Below, we illustrate the steps on creating a GPT that knows everything about web scraping, as conveyed in an academic article (Fields of Gold: Scraping Web Data for Marketing Insights) published in the Journal of Marketing by a faculty member at Tilburg University.
- Initial explanation
Explaining the GPT Builder what you want the new GPT to do. You can start the sentence with: Please set up a GPT that… [purpose of the GPT]. - GPT Name
The Builder will propose a certain name for the GPT, which you can either agree on or change. You can also always change the name later in the configure tab (5).
- Profile picture
The Builder will then make a profile picture for the GPT, which you can again either agree on or change. You can also upload a different picture later on in the configure tab.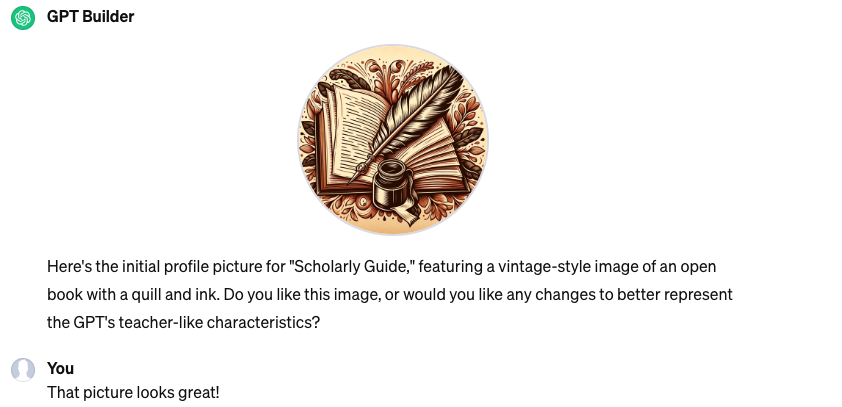
- Refining instructions
The GPT Builder will then ask other questions to refine the instructions of the GPT (7). These questions were in our example:- Are there any specific types of responses or interactions that should be emphasized or avoided when discussing web-scraping? This could include focusing on ethical considerations, avoiding overly technical jargon, or any other preferences you have.
- How should “Scholarly Guide” handle situations where clarification is needed? Should it ask for more details, or make assumptions based on the context to provide the best possible response?
- Finally, how would you like “Scholarly Guide” to communicate with you? Should it use formal academic language, or a more casual and approachable style? This will help in personalizing the interaction to your preference.
Below is a screenshot on what the GPT Builder actually made in the background when talking to the GPT builder. It specified the name (5), a description (6), detailed instructions (7) and conversation starters (8).
In the configure tab you can also upload files that you want the GPT to know about. Here we will upload the article for our example.

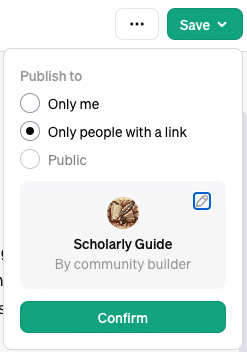
When you are happy with your GPT you can either publish the GPT publicly, only to people with a link or keep the GPT for yourself.
Conclusion
In conclusion, creating your own customized GPTs within ChatGPT empowers you to tailor powerful AI tools to your specific needs, improving productivity and creativity. By following the steps outlined in this article, you can streamline tasks, improve learning experiences, and drive innovation. Start customizing your GPTs today and unlock the full potential of AI for your personal and professional growth.


