This article walks you through the process of integrating ChatGPT into your Excel spreadsheets. On the website, we have an article on how to integrate ChatGPT inside Word and we have looked at how to use ChatGPT for Excel. Let’s upgrade your Microsoft Excel application, by adding a direct ChatGPT button into your Excel interface. Now, you can specify your prompt into a worksheet cell, Click the ChatGPT button and this action triggers the creation of a new worksheet where you’ll find the response from ChatGPT.
And the best part is that no coding skills are needed to implement this extension in your spreadsheet. The integration is a one-time setup. Meaning that, once completed the functionality becomes available across all your spreadsheets. The only catch is that this functionality is currently limited to users on Windows operating systems.
Setting up your Workbook
- Step 1: Open a new Excel workbook.
- Step 2: Enable the Developer Ribbon.
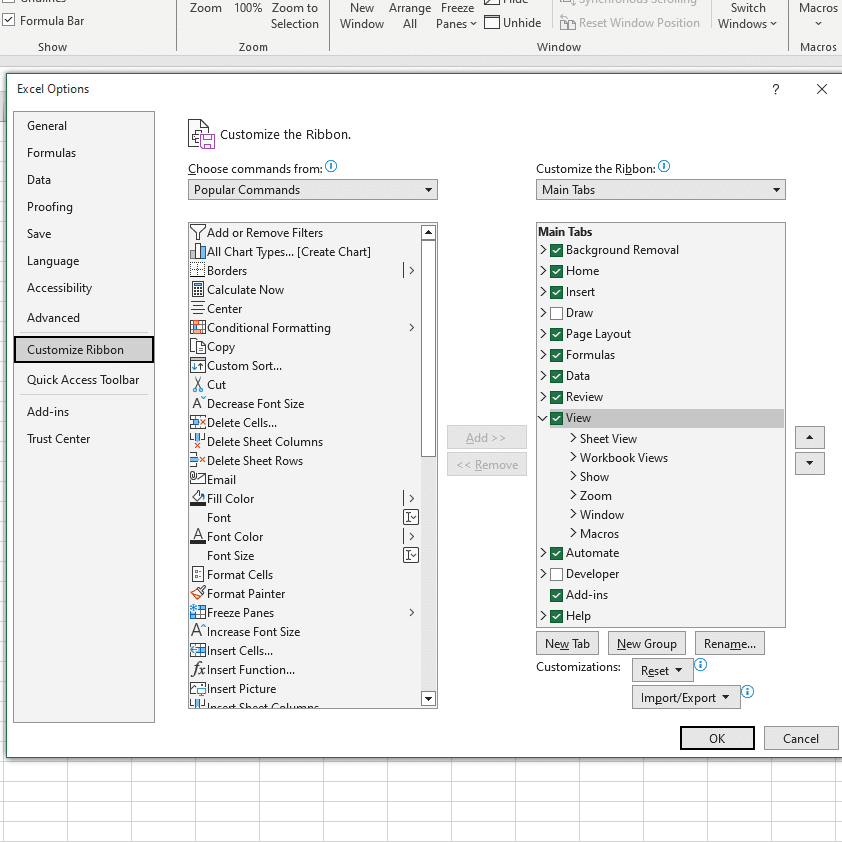
- Right-click on the ribbon and select “Customize the Ribbon.”
- Check the box next to “Developer” and click “OK.”
- You will now see a new “Developer” tab in your ribbon.
- Step 3: Set-up the Macro.
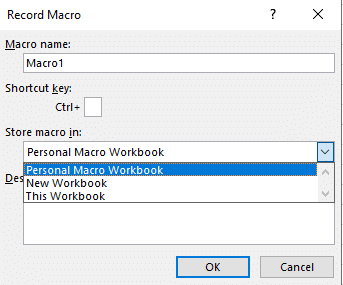
- Click on the “Developer” tab, then select the “Record Macro” button.
- In the pop-up window, choose “Personal Macro Workbook.”
- Click “OK” to begin recording. Excel will create a new personal workbook in the background to store the necessary code for running ChatGPT.
- Immediately stop the recording after you start.

Bringing in the Code
- Step 1: Access the Visual Basic Editor.
- Navigate to the Developer tab and open the Visual Basic Editor.
- Alternatively, you can use the shortcut
AlT + F11in Excel.
- Step 2: Locate the recorded module.
Step 3: Prepare to import the code.
Download the ZIP file linked below to your computer.
Locate the saved ZIP file, right-click on it, and choose “Extract All” or “Open” from the context menu to access its contents.
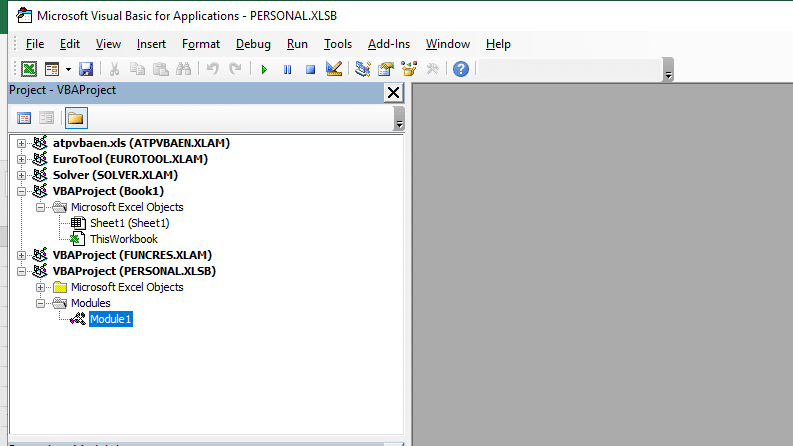
In the Project Explorer, click on “VBAProject (PERSONAL.XLSB).”
Navigate to the “Modules” section and select “Module 1.” This is the module that was created when you recorded the macro.
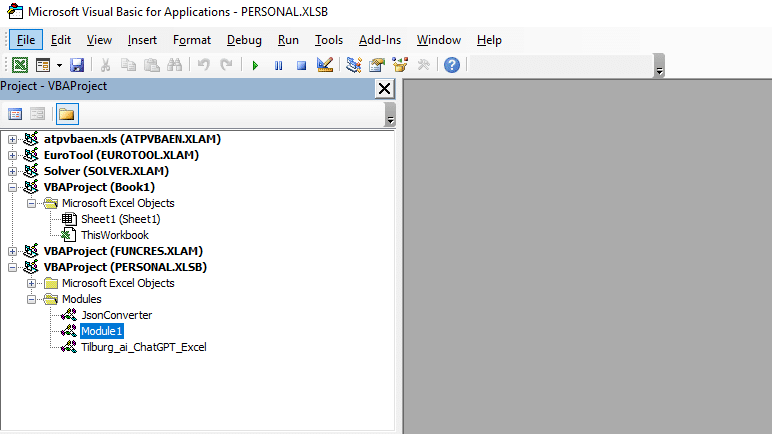
This Zip-file contains two .bas files a JSON converter and a ChatGPT module.
- Step 4: Import the modules.
- Inside the Visual Basic Editor, press
CTRL + Mto open the import dialog. - Select the first module from the files you extracted earlier and import it.
- Repeat this process for the second module.
- Inside the Visual Basic Editor, press
- Step 5: Configure additional settings.
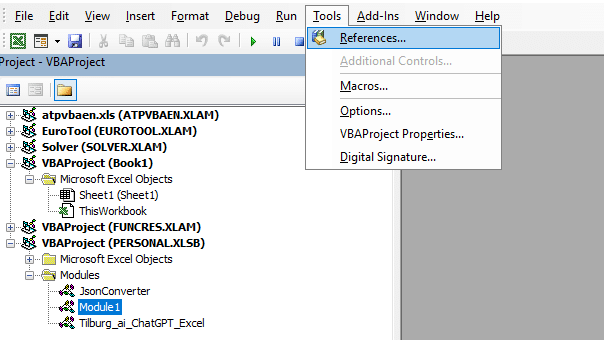
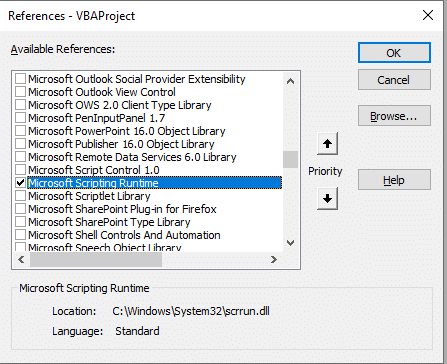
- Navigate to
Tools > References, and check the box for “Microsoft Scripting Runtime”. Once checked, click “OK.”
- Navigate to
Credit where credit is due: Tim Hall created the JSON Converter, a handy tool for which he has kindly shared the code on GitHub. And the second file, the ChatGPT module is created by Sven Bo, also available on GitHub.
Setting up the API Key
- Step 1: Open the ChatGPT module in the Visual Basic Editor.
- Open the Visual Basic Editor and locate the ChatGPT module you previously imported.
- In this module, you’ll find the code that integrates ChatGPT into Excel. Scroll to the section labeled ‘OpenAI API key.’
- Replace the placeholder key with your personal OpenAI API key.
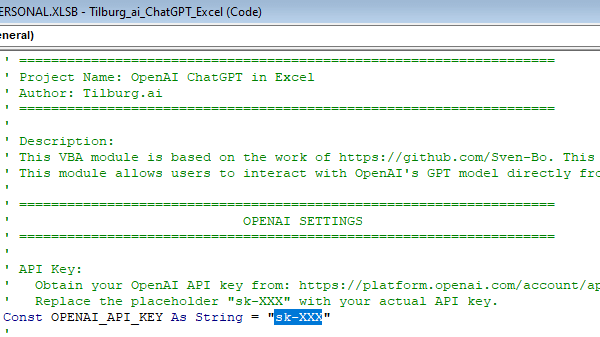
If you do not yet have an OpenAI API key, check out this article to create one. To create an API key, you must click on create a new secret key. As implied by the name, this key should be kept confidential and never shared!
Important: Please be aware that using the OpenAI API is not a free service. This ChatGPT integration comes on a Pay-As-You-Go basis through the OpenAI API, where charges are based on your usage. The costs vary by the selected model and the length of the prompts and responses. Makes sure you understand the cost implications before use.
Step 2: Save and exit.
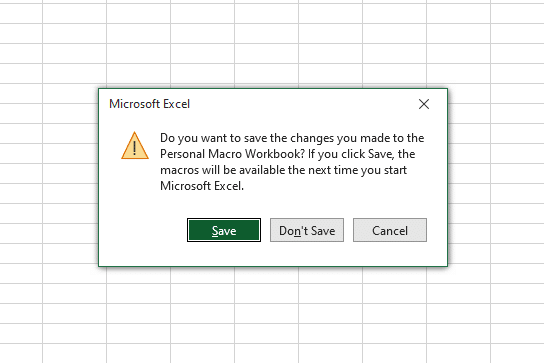
- Once you have updated the API key, close the Visual Basic Editor.
- Then close the whole workbook. You will be prompted to save the changes to your personal macro workbook. Click on “Save”.
Adding the ChatGPT Button in Excel
The extension is now implemented in Excel, There are several ways to use it.
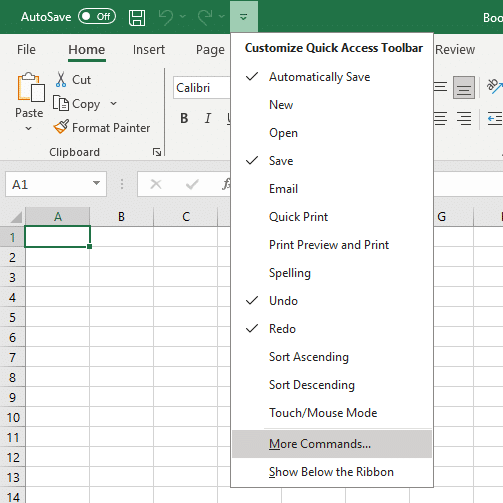
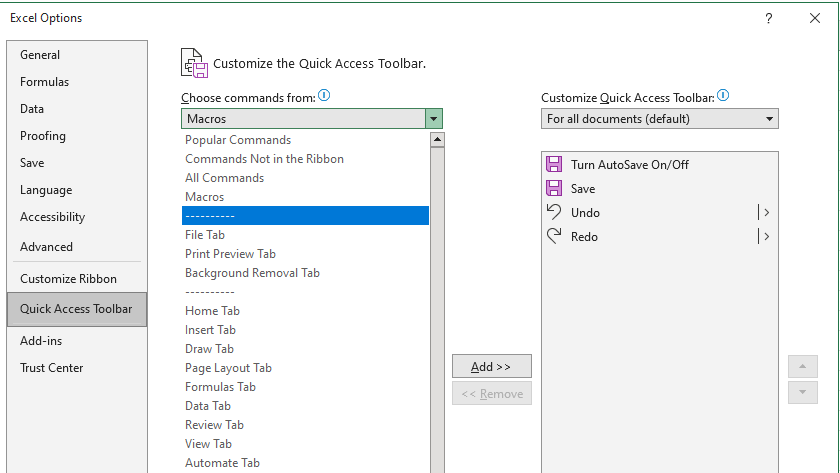
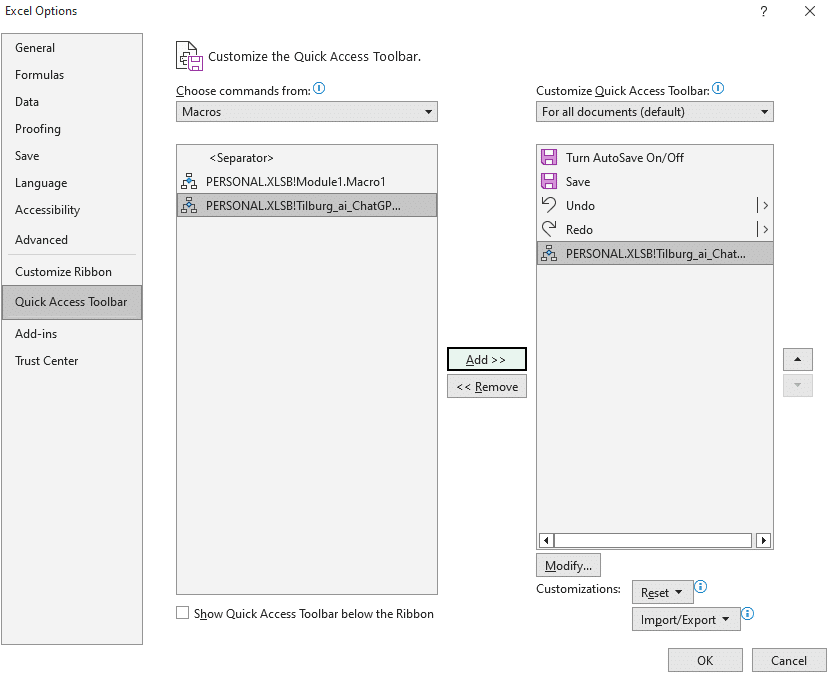
- Option 1 Button inside the Quick Access Toolbar
- Select Customize Quick Access Toolbar > More Commands.
- In the “Choose commands from” section:
- Choose Macros > ChatGPT Macro > ADD.
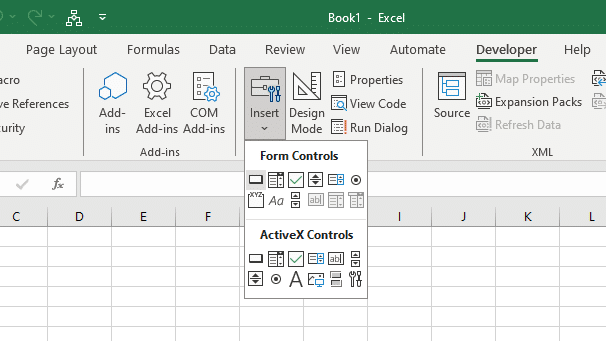
- Option 2: Button in Your Worksheet
- Navigate to the “Developer” tab, select “Insert,” then choose “Button.”
- Draw the button on your worksheet, assign the “ChatGPT Macro” to it, and click “OK.”
Addressing a Common Error
If you encounter the error message “Error: programmatic access to Visual Basic project is not trusted,” you can solve it by adjusting your Excel settings. This error typically occurs when Excel’s security settings prevent macros from running programmatically. Here’s how you can fix this:
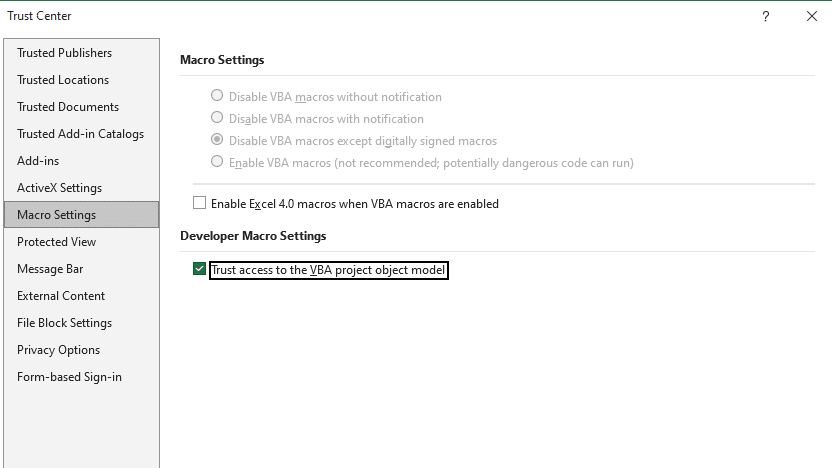
- Go to File -> Options -> Trust Center.
- Inside the Trust Center, click on Trust Center Settings.
- Navigate to Macro Settings.
- Check the option Trust access to the VBA project object model.
Enabling this setting allows macros to run and interact with the Visual Basic for Applications (VBA) project system, thus resolving the error. Remember to save your settings before closing the dialog boxes.

Use the ChatGPT integration:
Once you have done all the work and the ChatGPT integration is complete, you can start prompting directly in Excel:
- Select a cell in your worksheet and type your prompt. This could be a question or a command related to your data.
- Press the button located either in the Quick Access Toolbar or directly on your worksheet.
Following these steps will lead to the creation of a new worksheet that displays the response from ChatGPT.
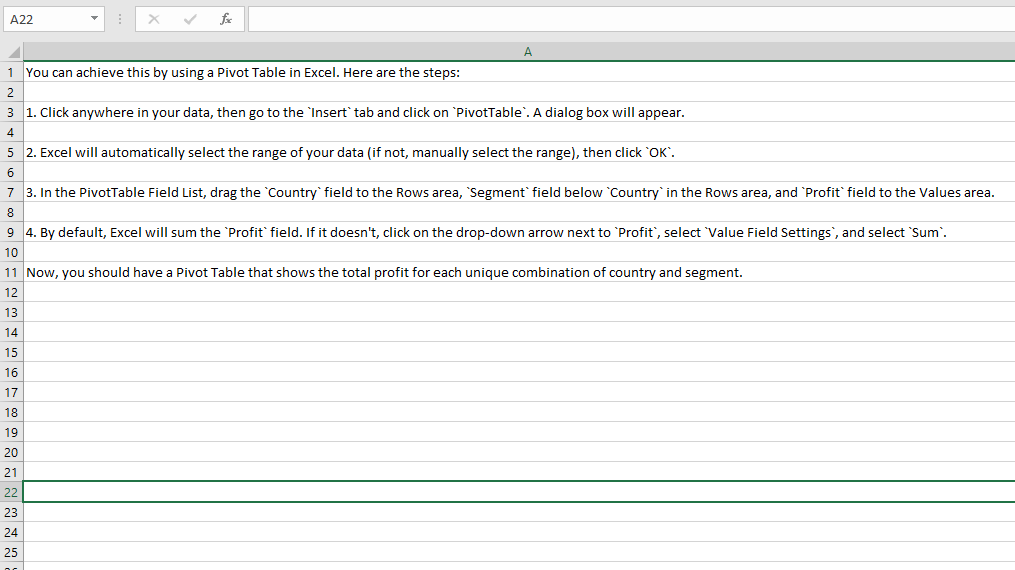
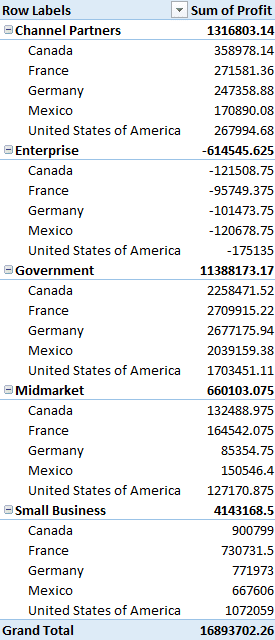
Example use Case
Imagine you have a dataset filled with financial information. Your task is to use Excel to examine how profits are distributed across various countries and business segments. To get an step-by-step instruction how to achieve this, specify your task to ChatGPT in a text cell using a similar prompt:
How can I calculate the total profits from column J, grouped by each country in column B and their corresponding segment in column A? I need to aggregate the profits for each unique combination of country and segment.
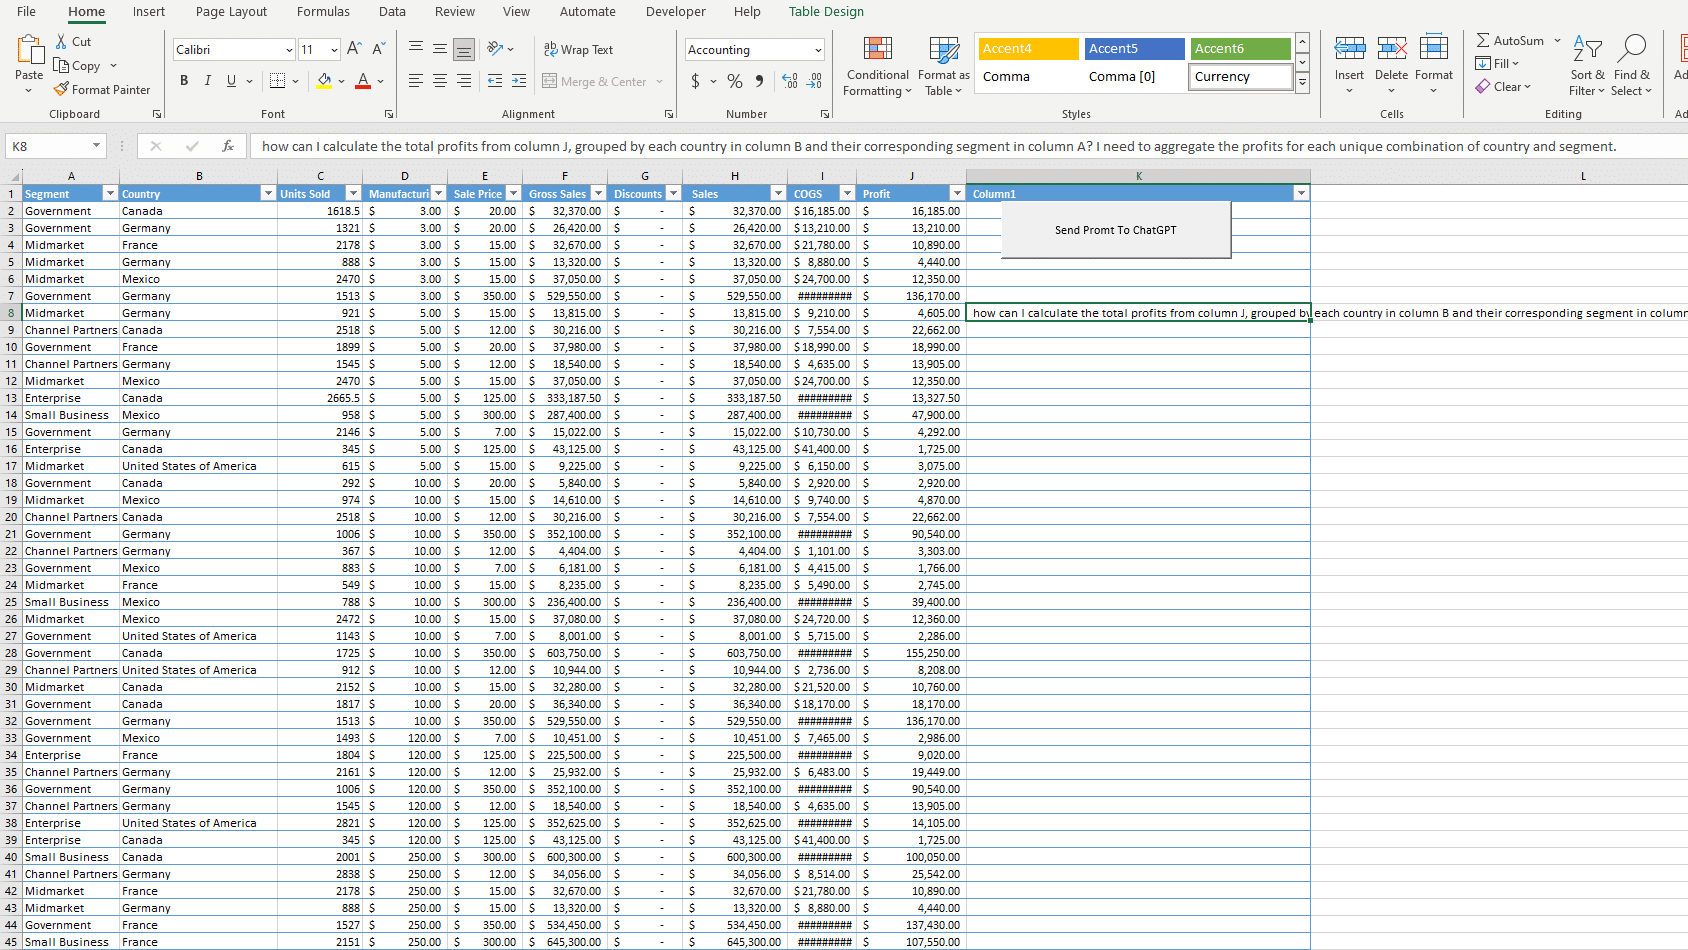
Once you’ve entered your prompt, simply click one of the provided buttons in the Excel extension. The application will generate a new sheet containing step-by-step instructions on how to accomplish your task. Follow these instructions, and you will end up fulfilling your task. That’s Excel-lent!