Integrating ChatGPT in Word to have the power of AI in your Word document? With the “GPT for Word” add-in, Microsoft Word is no longer just about typing and formatting; it becomes a dynamic and interactive workspace. This integration brings the capabilities of ChatGPT directly into your Word environment, changing the way how you engage with documents.
In this step-by-step article, we will show you how to use ChatGPT inside your Microsoft Word documents. From the initial download and installation of the add-in to setting up and using your OpenAI API key, we will cover each step to ensure you will have a smooth integration. We will also explore practical functionalities of ChatGPT within Word, including creating document summaries, obtaining explanations for specific words, and editing your documents with chat responses.
Imagine a sidebar in Word where you can have a one-to-one conversation with your document. This add-in offers a variety of functionalities that enhance your interaction with text. Need to understand a lengthy report quickly? The add-in can state the essence of your document in simple terms. Are you encountering complex jargon? Have it explained in context. Are you working with documents in foreign languages? Translate them directly within Word. Additionally, the tool aids in rephrasing and refining your content, speeding up the editing process and making it more intuitive and effective.
This integration isn’t limited to Word; it extends to Microsoft Excel, Google Sheets, and Google Docs, broadening its applicability across various platforms. For more information check this link out.
How to Install ChatGPT in Word
Step 1: Downloading the Add-in
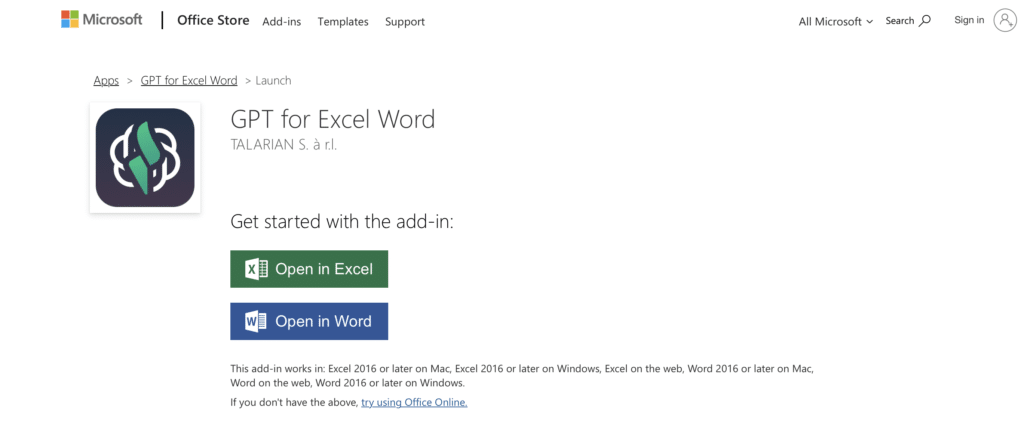
- On the web: Access the installation page and click ‘Open in Word‘. A pop-up will request permission to proceed. Confirm to launch of Microsoft Word. Follow the prompts in the Microsoft Word desktop app by clicking ‘Accept and Continue‘. This will install ‘GPT for Word’ to your Microsoft account and make it accessible from the Home tab in both the desktop and web versions of Word.
- Directly inside Word: Open Microsoft Word, navigate to “Add-ins” and search for “GPT for Excel Word” in the store. Add it to your Word. After adding, its icon will appear on your ribbon.

Step 2: Create your OpenAI API Key
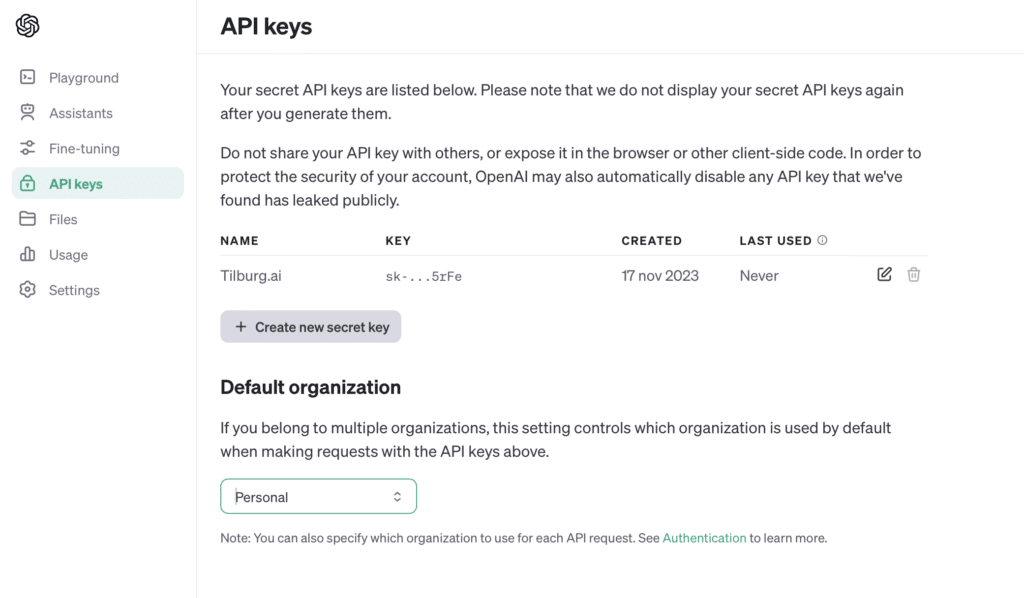
To utilize the add-in, it’s necessary to access the ChatGPT API, which requires an OpenAI API key. This key is used for monitoring usage and managing billing. Follow these steps to create your OpenAI API key:
- Sign Up or Log In: Visit openai.com and either log in to your account or sign up if you don’t have one.
- Navigate to the API Section: Once logged in, avoid heading straight to ChatGPT. Instead, click on the ‘API‘ section.
- API Key Creation: In the API section, locate and click on “API keys”. Then select the option to “Create new secret key”. OpenAI will generate a unique secret API key for you.
- Copy and Safeguard Your Key: Once your secret API key is generated, copy it to your clipboard. Keep this key secure as it’s essential for accessing the API.
- Understand the Billing Process: Be aware that while there might be a free trial period (typically three months for new accounts), afterwards you will need to purchase credits to continue using OpenAI’s API services once the trial expires.
Step 3: Configuring Your OpenAI API Key in GPT for Word
To activate the “GPT for Word” add-in, a one-time setup with your OpenAI API key is required:
- Access the Add-in: Open a Word document and click on the “GPT for Excel Word” option in the Home tab. The button we installed in step 1. A sidebar will appear on the right side of your Word document.
- Enter Your API Key: In the sidebar, paste your unique OpenAI API key in the designated field.
- Click Save API key: You have now set up your OpenAI API key in GPT for Word.
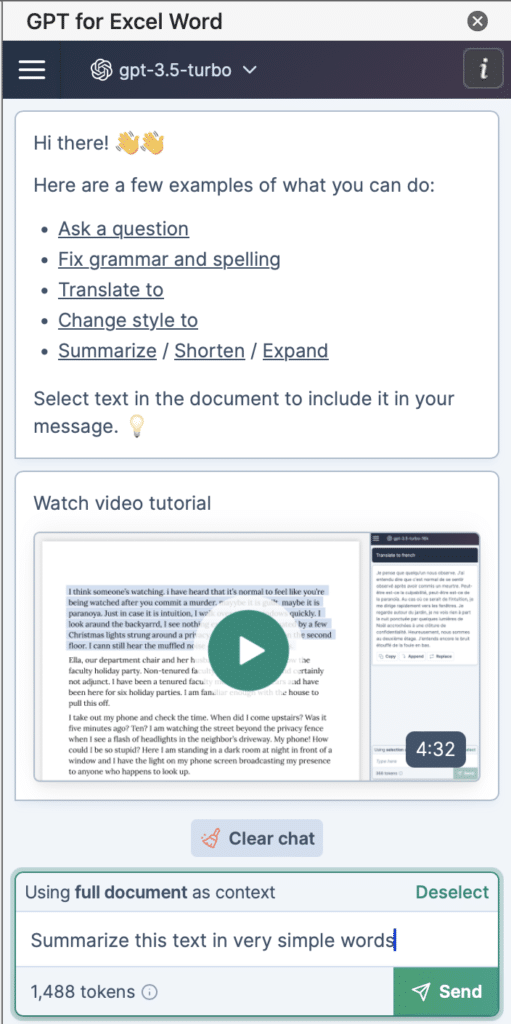
- Interact with the Add-in: Now, you can use the add-in as a writing assistant. Simply type a prompt into the chat bar, as you would in ChatGPT. Click on “insert” to add the AI-generated response into your document.
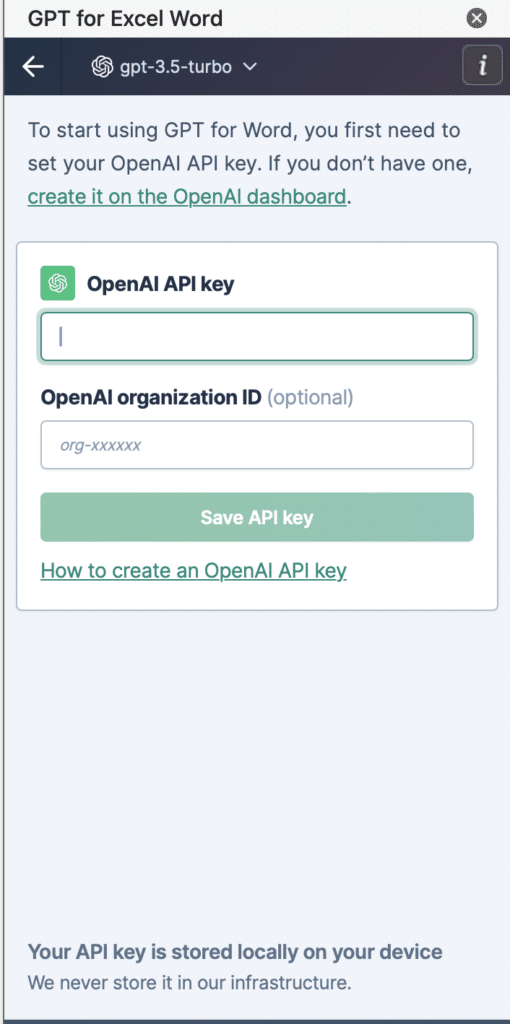
Be aware that the OpenAI API operates on a fee-based system. The billing is usage-based, meaning you are charged according to the extent of your API usage. If you don’t use the add-in in a given month, you will not be billed for that period. For more information about the pricing, please consult the OpenAI pricing page.
ChatGPT in Word Functionalities
Interacting with Your Word Documents Using Chat
Engage with your documents using the chat feature to get AI-generated responses. Here’s how you can incorporate parts or the entirety of your document into the chat. We’ll go through two practical examples:
Creating a Summary of Your Document:
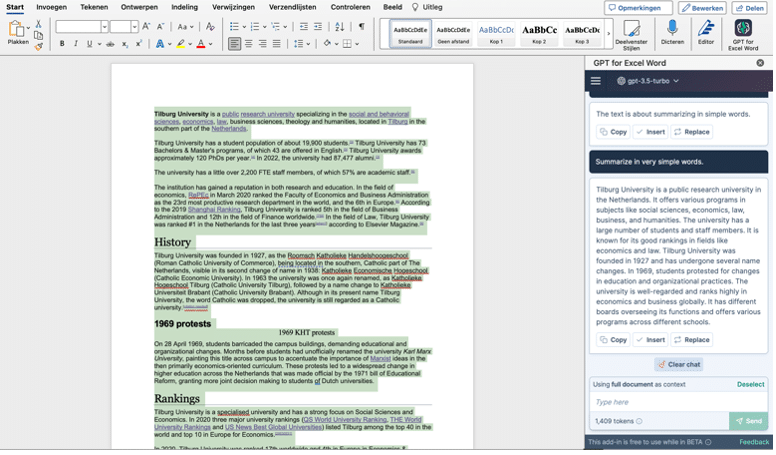
- Select the Document: Highlight the entire document by pressing Ctrl+A (Windows) or Cmd+A (Mac).
- Enter Your Request: In the chat, type a prompt like “Summarize this text in very simple words.”
- Send and Receive Response: Click ‘Send‘. The chat will generate a summary based on your request and the selected text.
- Chat History: The text you selected, the prompt you entered, and the resulting summary will be saved in your chat history. This information will be considered in future messages unless you choose to clear the chat.
Obtaining Explanations for Specific Words:
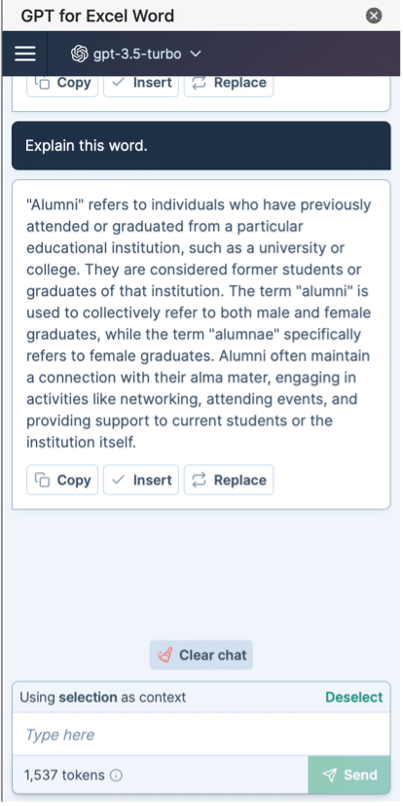
- Choose a Word: Firstly, select a word in your document that you want explained. For instance, let’s choose the word “alumni.”
- Ask for an Explanation: In the chat, type a prompt like “Explain this word” referring to the selected word.
- Initiate the Request: Click ‘Send‘ to submit your query.
- Review the Explanation: The chat will generate an explanation for the selected word. Since your document and its summary are stored in your chat history, the chat’s response is tailored to the context of your document.
If you don’t need the stored chat history for future use, you can clear it by clicking on ‘Clear chat‘. This action removes the previously stored interactions and document context.
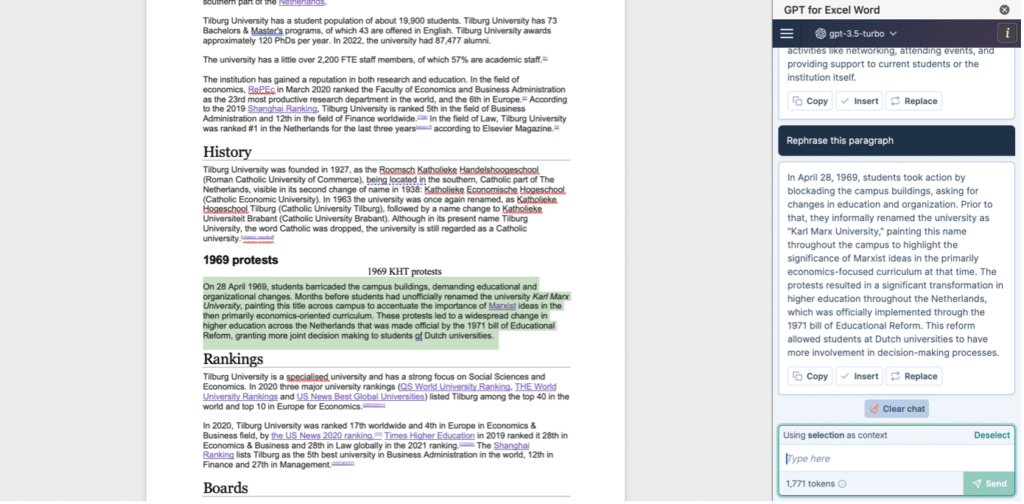
Editing Your Word Documents with Chat Responses
You can directly add chat-generated responses to your Word documents. Underneath is the procedure described:
- Select a Paragraph: Highlight a specific paragraph in your document that you wish to modify.
- Input Your Request: In the chat, type a command such as “Rephrase this paragraph.”
- Send the Request: Click ‘Send‘ to process your request.
- Review the Result: The chat will produce a rephrased, simplified version of the selected paragraph.
- Implement the Changes: Click ‘Replace‘ to substitute the original paragraph with the newly generated, simplified version.
For students and academics, remember that the “ChatGPT for Word” add-in is helpful but has limits. It’s good for quick help with summarizing, translating, and editing, but it might not fully get complex topics. Don’t rely on it for everything. Use it as an assistant, not a replacement. Always double-check its work to ensure it aligns with your intent. Remember, this tool is to assist, not to overshadow your own ideas and decisions.
Summary
Throughout this article, we have guided you through the process of integrating ChatGPT into your Microsoft Word documents via the “GPT for Word” add-in. This tool not only “upgrades” your Word environment by bringing in ChatGPT’s capabilities but can also be extended to other platforms like Microsoft Excel, Google Sheets, and Google Docs.
From the initial download and installation of the add-in to setting up and using your OpenAI API key, we’ve covered each step. It’s important to remember that while the OpenAI API offers a trial period, continued usage is subject to fees, based on your usage extent.
We’ve also explored the practical functionalities of ChatGPT within Word, including creating document summaries, obtaining explanations for specific words, and editing your documents with chat responses.
In summary, the “GPT for Word” add-in is there for those looking to leverage AI in their document creation and editing processes, offering a range of tools accessible within the familiar interface of Microsoft Office applications. Whether you’re summarizing long texts, seeking explanations, or rephrasing paragraphs, this add-in provides the necessary tools to elevate your productivity and document management to the next level.


